 |
| What's Hot! | Products/ Tools | EFI Tuning | Basic Tuning | Advanced Tuning | Chassis Tuning | Advertise with us |
CATEGORIES FOR ARTICLE LINKS BELOW
![]()
DOT Help |
O2 sensor Replacement
How to repair / replace the oxygen O2 sensor on a car or truck
Contributed by: enginebasics.com
At one point in your life you’re going to get a check engine light only to research and find that the culprit is the O2 sensor. These sensors have to live in the extreme environment of the exhaust path of the motor so replacement is inevitable.
Where are the O2 sensors located?
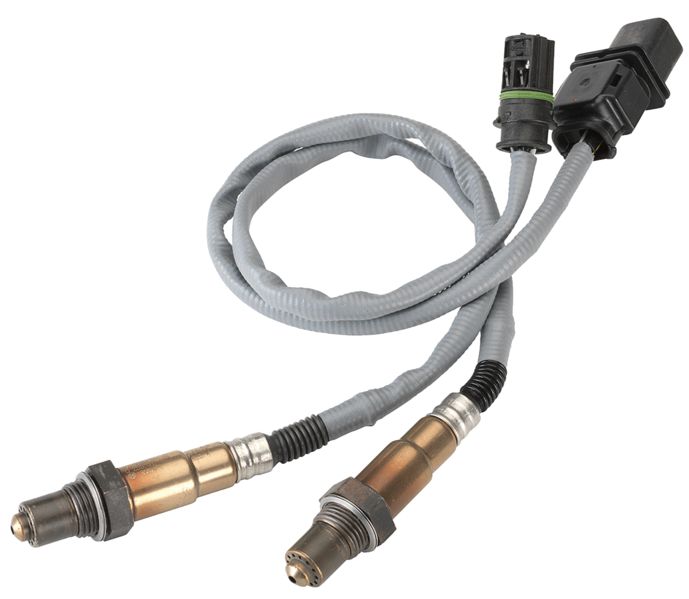
Oxygen sensors are located in the exhaust system of the engine. Depending on the configuration on the engine (inline 4, inline 6, V6, V8) it may be equipped with anywhere from 2 to 4 oxygen sensors. One of the sensors will be located very close to the engine. It will be about 3/4” in diameter and screwed directly into the exhaust piping. They have 4-6 wires going into them and will have an electrical clip that will be located nearby that must be unclipped before removal.
A second O2 sensor will be located farther down the exhaust path just after the catalytic converter. If you don’t know what a catalytic converter is, it’s the device that cleans/scrubs the exhaust of pollutants. This second O2 sensor is located after the catalytic converter as its job is not to help the motor run better, but instead throw a check engine light if the exhaust isn’t being cleaned up enough suggesting the catalytic converter is failing. This is why they no longer have to shove an exhaust sniffer in the exhaust pipe of your car when you do emissions testing. Instead they trust that the rear oxygen sensor is working and a check engine light will illuminatse if there is a problem. Now you understand why if your check engine light is illuminated you instantly fail your safety and emissions test.
How to replace the O2 sensor on a car or truck?
Let’s do this in steps so nothing is missed and we make the job as simple as possible. We’ll assume you saw a check engine light pop up on your car or truck and take it from there.
Step 1: Go to your local automotive parts store that offers to check your cars error codes for free. They will hook up to the cars computer and see why the malfunction light is on and what needs to be fixed. Most vehicles will not only tell you that you have a bad o2 sensor but will tell you the location as well. Example would be a P0134 code telling you the Bank 1 Sensor 1 has failed. This means that on the first bank (so it must be a ‘V’ configuration type engine) the first sensor has failed. This would be the sensor located as close to the engine as possible. While you’re at the parts store most of them will rent you an O2 sensor removal tool for free. Pick that up and it will make this job a snap.
Step 2: Unplug the negative terminal off the battery. This will ensure that while you’re messing with O2 sensor electrical plugs you don’t accidently mess anything up.
Step 3: Locate the sensor that has triggered the check engine light and causing you the problem.
Step 4: Unplug the Oxygen sensor connector. This usually involves pushing a button or moving a clip to release the clasp mechanism.
Step 5: Place an oxygen sensor socket on the sensor and turn it counter clock-wise (leftly loosey everyone).
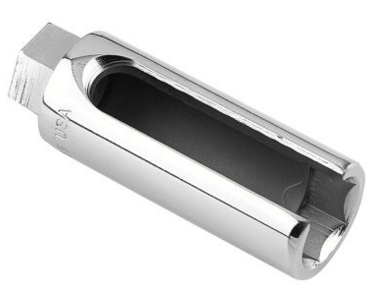
If you don’t have an O2 sensor socket you can use an open-ended wrench, but sometimes space doesn’t allow large wrench’s to fit. As mentioned above though, most part stores will loan you the socket. These things can be stubborn so keep a can of PB blaster, or WD-40 ready to get that sucker to loosen up.
Step 6: Once the old oxygen sensor is out it’s all easy from here. Install and tighten down the new sensor and reverse the order of the steps till your back at step 1.
Where to buy an Oxygen Sensor (O2 sensor) for my car or truck?
Local automotive parts stores seem like the obvious answer, but many are starting to have great luck with online suppliers if they have the ability to wait several days for shipping. It should be said up front that the margins in the automotive industry for parts are TIGHT so don’t expect huge discounts to be found on OEM parts. Discounts are usually found by deciding to go with aftermarket pieces, but these can be cheaper parts that may have a faster failure rate, so do your research.
Hopefully you found this article to be informative and help you with your next car project. Be sure to check out our other articles found in the links at the top of the page. Like us on Facebook, and follow us on twitter for updates and new articles. Contact us if you have any questions.
ATTENTION READER:
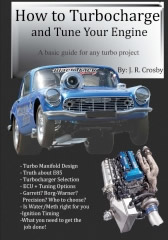
If you enjoyed the information and article you just read be sure to check out our newly released book with even more exciting photo's and information:How to Turbocharge and Tune your Engine
Want to know more about your particular Make and Model vehicle? All of these vehicles are covered in the tech, maintenance and repair articles found above. Enginebasics is the wiki or wikipedia of car part, repair, how to and tuning information. Let us be the class 101 for your automotive learning.
| Ford | General Motors GM | Pontiac | Jaguar | Land Rover | Nissan |
| Toyota | Honda | Lexus | Acura | Lotus | Scion |
| Infinity | BMW | Mercedes | Mitsubishi | Ferrari | Maserati |
| Lamborghini | Volks Wagen VW | Saab | Audi | Hyundai | Kia |
| Subaru | Mazda | Chevy | Volvo | Caddilac | Dodge |
| Chrylser | Daewoo | Porsche | Mercury | Freightliner | MG |
Individual Models
| Ford Mustang | Mitsubishi Eclipse | Mitsubishi Evo | Subaru WRX / STI | Dodge Viper | Chevrolet Corvette |
| Nissan Skyline | Honda S2000 | Nissan 350z | Toyota Supra | Chevy Camaro | Lotus Elise Exige |
| Honda Civic | VW Golf | Dodge SRT-4 | Eagle Talon | Acura Integra | BMW M3 |
| Nissan 240sx | Porsche 911 | Acura NSX | Honda Accord | Toyota Camry | Toyota MR2 |
| VW R32 | Dodge Truck | Mazda Rx7 | VW Jetta | Sand Buggy | Nissan Sentra |
For the latest Automotive news and stories visit the websites below |


Our feature Build: An AWD V6 Civic